Item tutorial
From Faloria Wiki
This page describes how to add an item to the wiki.
First, decide which item you want to add. In this example, we will add a "Viking Helmet".
- Open up the page wiki.faloria.online:8080/Viking_Helmet - Always use capital letters for each new word and replace a space with an underline. For example Magic Plate Armor would be Magic_Plate_Armor.
- An empty page will show up that asks if you want to create a new page, see Figure 1
 Figure 1
 - Now that you have the new item page open, see the top right corner of Figure 1 where it sais "Create". Click it and you will enter an edit view.
- Refer to Figure 2, in the new editorial view you want to create the new page using a template. This will help you style the page according to all other items and requires minimum effort of you. Click "Insert" and choose "Template"
 Figure 2
 - A popup should be displayed, see Figure 3. Type the template name (in this case its "Item"). A dropdown selection should appear and you can click on the first option and select "Item" or just type it and click "Add template"
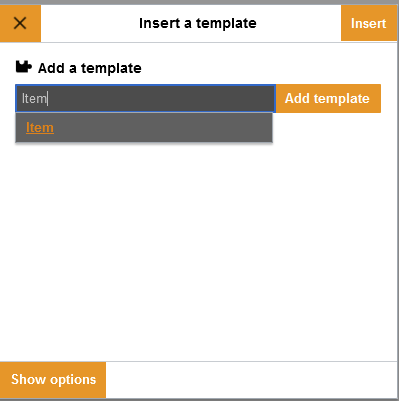 Figure 3
 - When you selected a template you can now start to add values to it. For an item, the following values are mandatory:
- name - The name of the item
- image - The image for the item, should be typed as following: [[File:Viking_helmet.png]]
- weight - The weight of the item (with one decimal)
- category - Which category it belongs to (Helmets, Armors, Legs, Shields etc)
- Optional values are
- description - A description of the item
- dropped_by - Which monster drop the item, should be typed as: [[Giant Spider]], [[Warlock]], [[Demon Skeleton]]
- coll_task - Collectable for a specific task, for example skins
- note - Some free text to fill in extra information on the item
- arm - Armor of the item
- atk - Attack value of the item
- def - Defense of the item
- vol - Volume of the item
- charges - Amount of charges for the item
- An example of how this may look can be seen in Figure 4. If you want to see all information related to a template, go to the template page. For items, it can be found here: Template:Item
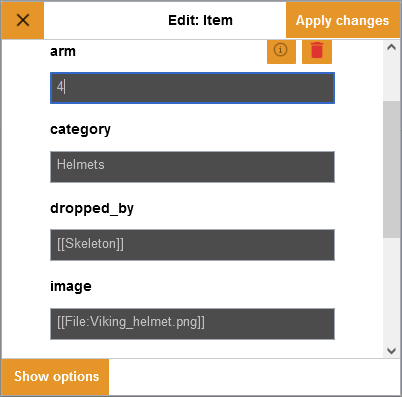 Figure 4
 - When you are done, click "Apply Changes" and then preview the item. If your values are correct and you are satisfied with the result, press "Save Changes" to submit the page and voila, you made your first item page! Figure 5
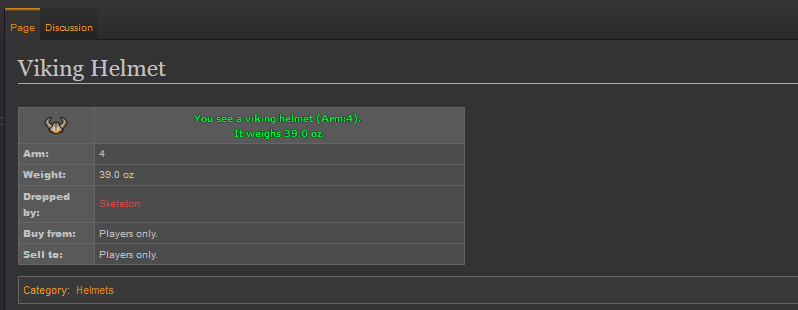 Figure 5


